Creating Events
Event Creation
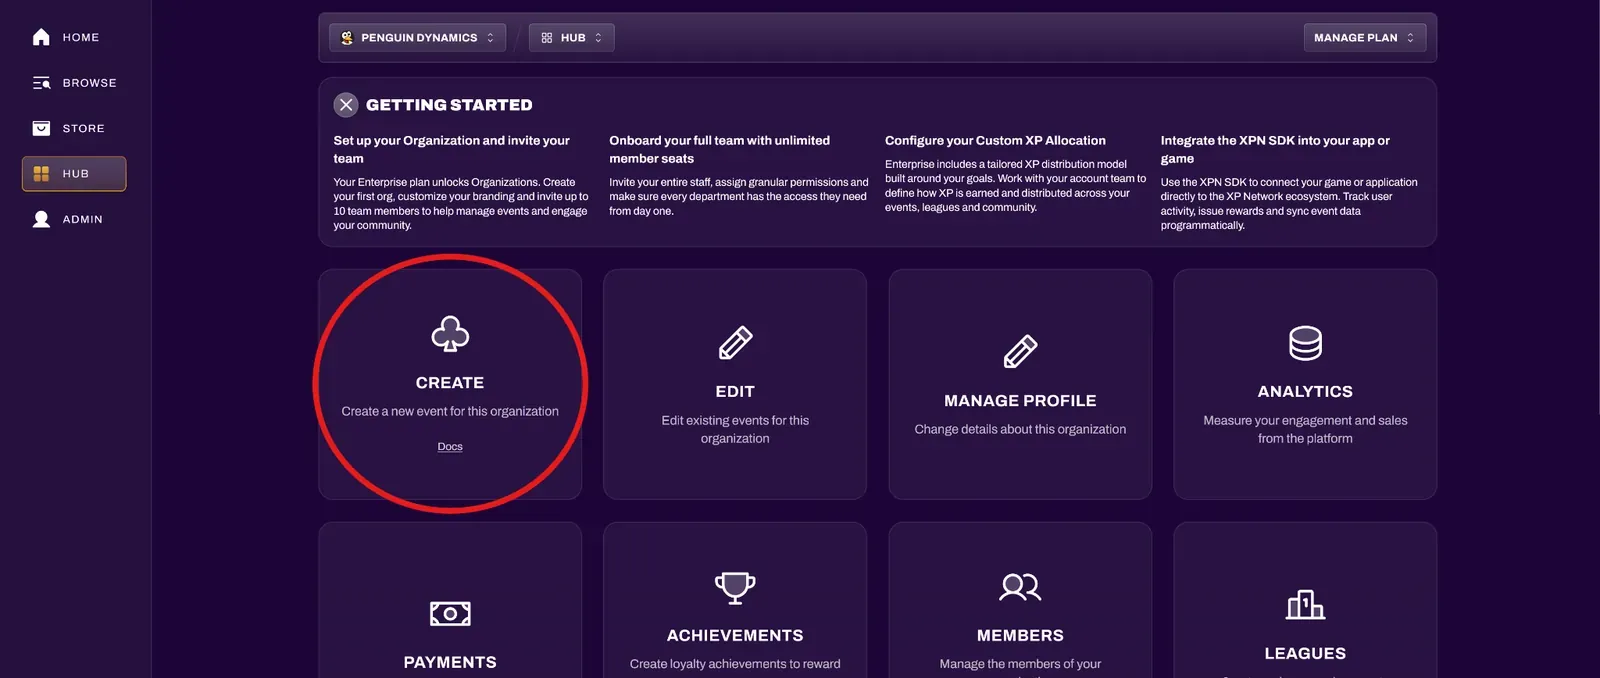
Section titled “Event Creation”You can access the event creator by navigating to your Hub. If you are part of multiple organizations, be sure to confirm the proper organization (from the organization dropdown) that you are creating the event under.
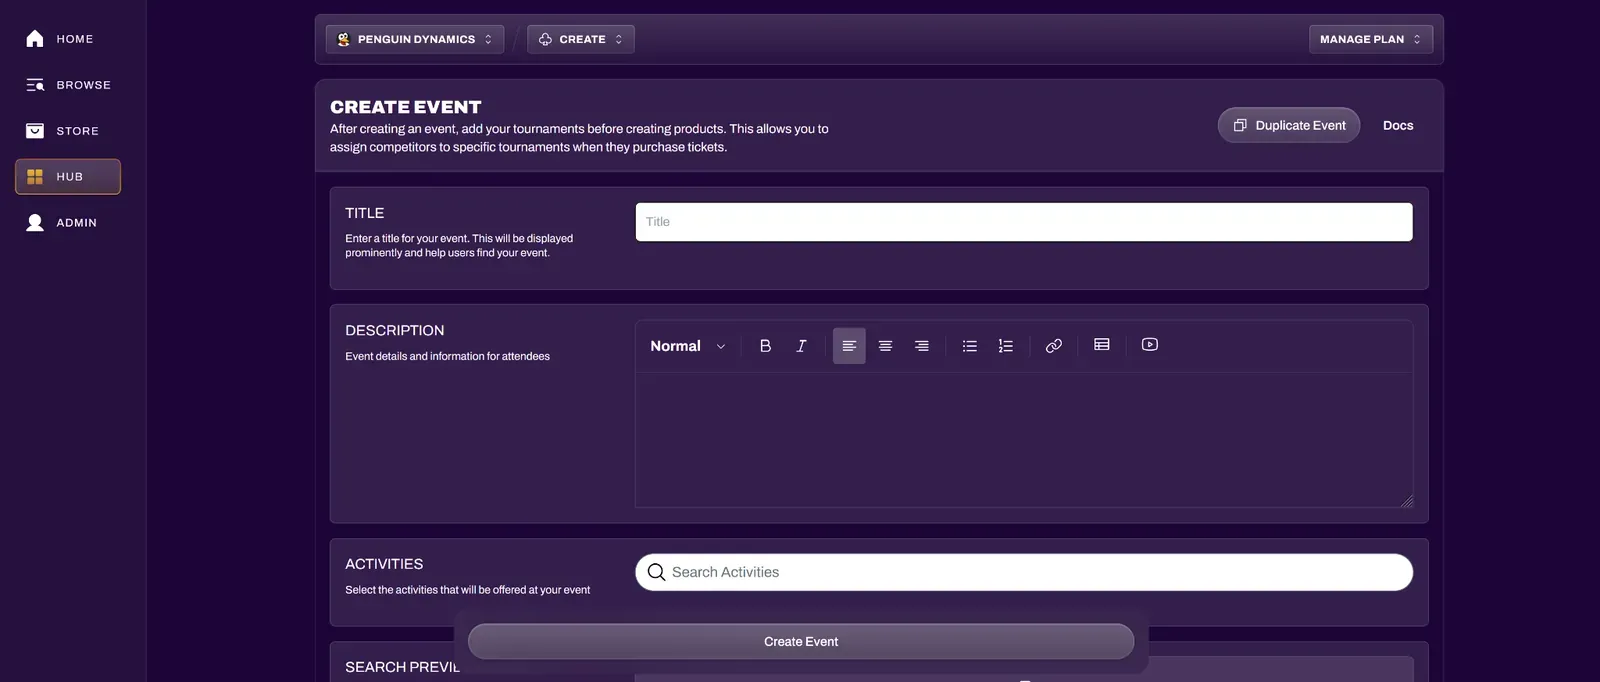
The event creator has many fields to fill out that help with event presentation and discovery. There is also a Duplicate Event button that can pull information and images from a previous event from your staff event history.
-
Description
Section titled “Description”The description editor has many tools available. You are able to organize information through bulleted or numbered lists, or even tables that you can modify and sort information in. You are also able to embed a YouTube video if you wish. You can also link off to external documents or pages for additional info for the event attendees.
-
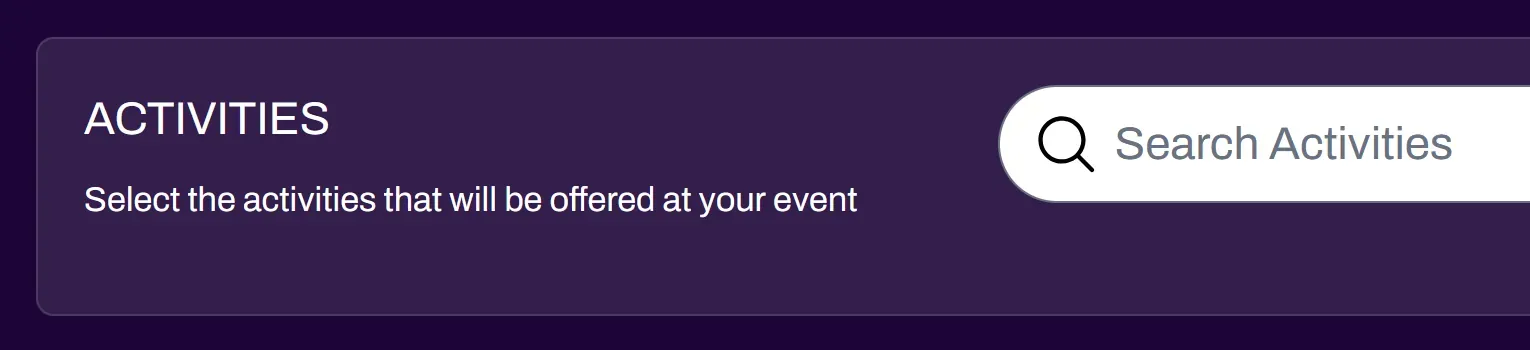
Activities
Section titled “Activities”Activities is the field where you want to enter games that are relevant to your event. For example, a BattleTech miniature paint night would use BattleTech as the activity. You are able to add more than 1 activity if your event calls for it.
-
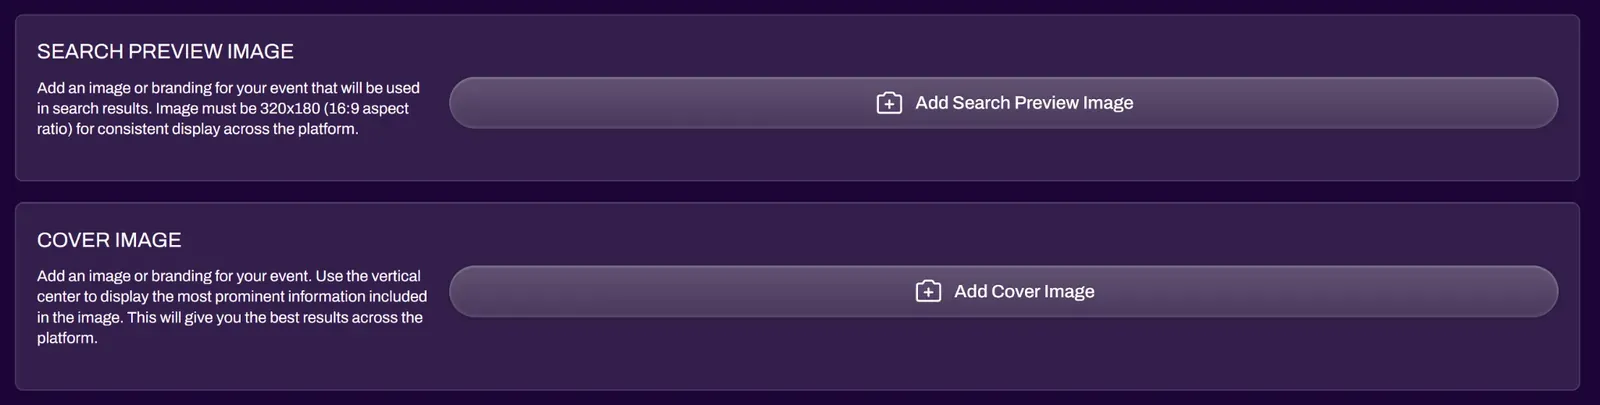
Images
Section titled “Images”Events require two different images, a banner image and a cover image.
The banner image is 16:9 and what people will see when they search events.
The cover image is 1:1 and represents the event when a user is on the event page.
A crop tool exists that helps set the image at the proper dimensions. This tool also prevents any squishing or warping of images that are not exactly the proper dimensions to start.
-
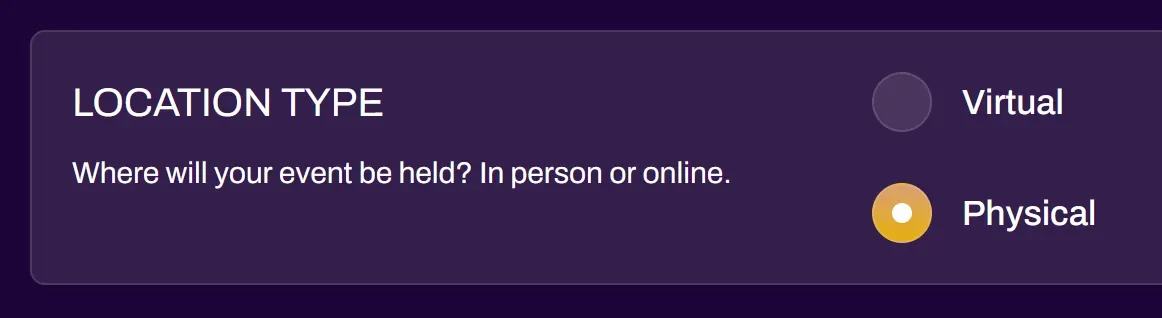
Location
Section titled “Location”Events can be Physical or Virtual.
Physical Events require a location which is verified by the built-in maps plugin.
Virtual Events require a URL location. This can be a website, a Discord server, Twitch channel, YouTube channel, Zoom link, etc.
-
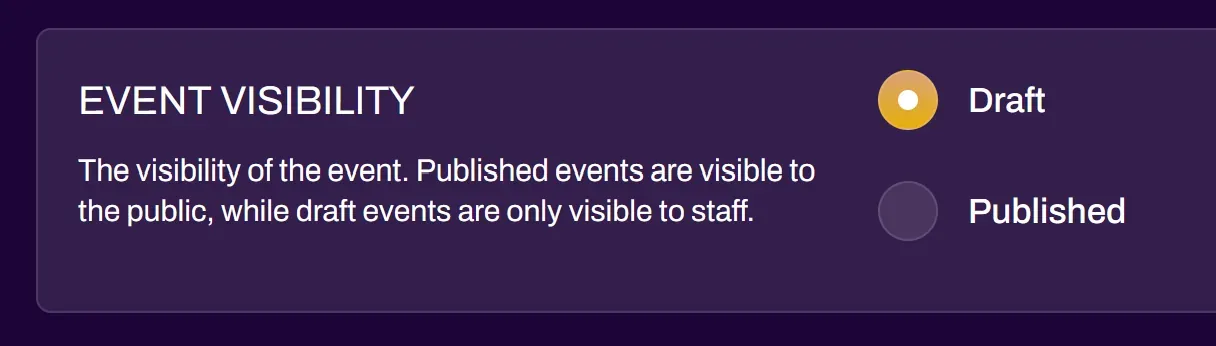
Visibility
Section titled “Visibility”Events can be set to Draft or Published.
In Draft mode, only the event creator and staff added to the event under the Staff tab will be able to see the event.
In Published mode, the event is able to be seen by the public.
You can view events in Draft by viewing Staff Events in your profile, or by going to the Edit section of the Events tab.
-
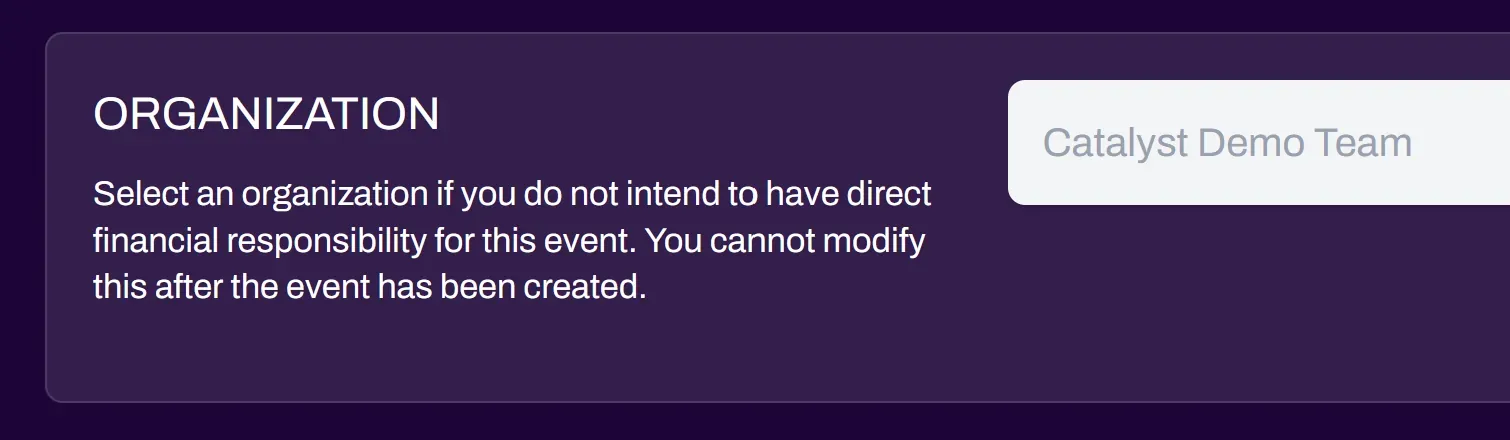
Organization
Section titled “Organization”The Organization field matters if you are creating the event on behalf of an organization already on XP Network. You must be an owner or a member of an organization in order for it to show up in this field. Organization owners and staff can add achievements to events that are created under their organization.
If this field is locked and you need to change it to a different organization, navigate back to the Hub and select the proper organization from the organization dropdown, and create the event again.
Any paid ticket sales will go to the Stripe account that is associated with this organization. The organization field cannot be changed once the event is created.
After your event is created, be sure to move onto Ticketing so that people can join your event.
Ticketing
Section titled “Ticketing”Events will need tickets created so that people can join the event.
There are three types of tickets that you can create:
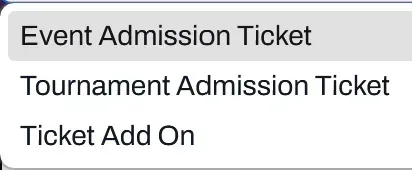
Event Admission Ticket — Most common ticket, general admission to the event.
Tournament Admission Ticket — Used only if your event has a tournament created for it. Make sure to create the tournament first before creating a Tournament Admission Ticket so you can combine the Admission and Tournament grants together in the same ticket.
Add-On Ticket — Used for bonus items such as merchandise, VIP packages, backstage tours, premium upgrades, and more. Add-ons do not count toward event capacity.
-
Name & Description
Section titled “Name & Description”Ticket Name and Brief Description are mandatory fields.
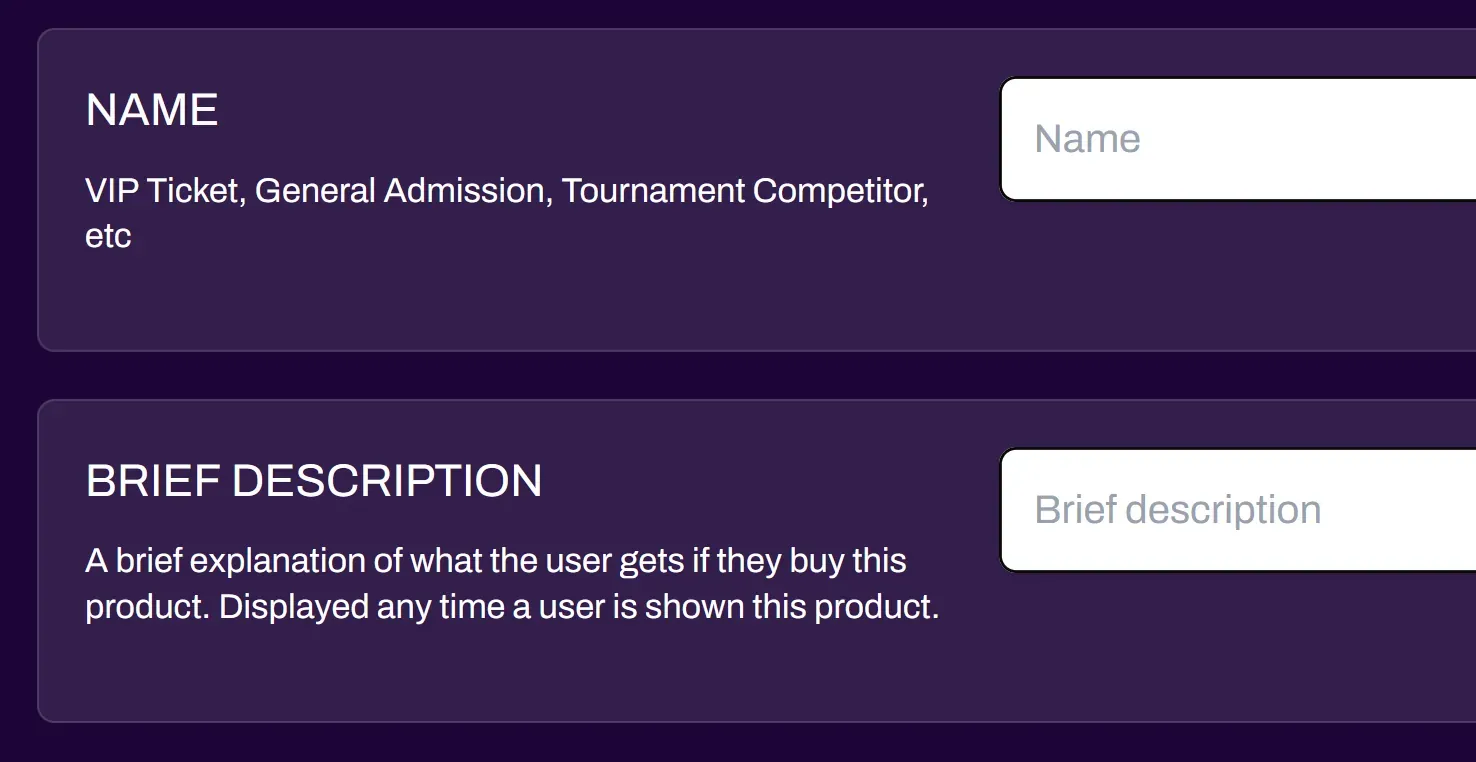
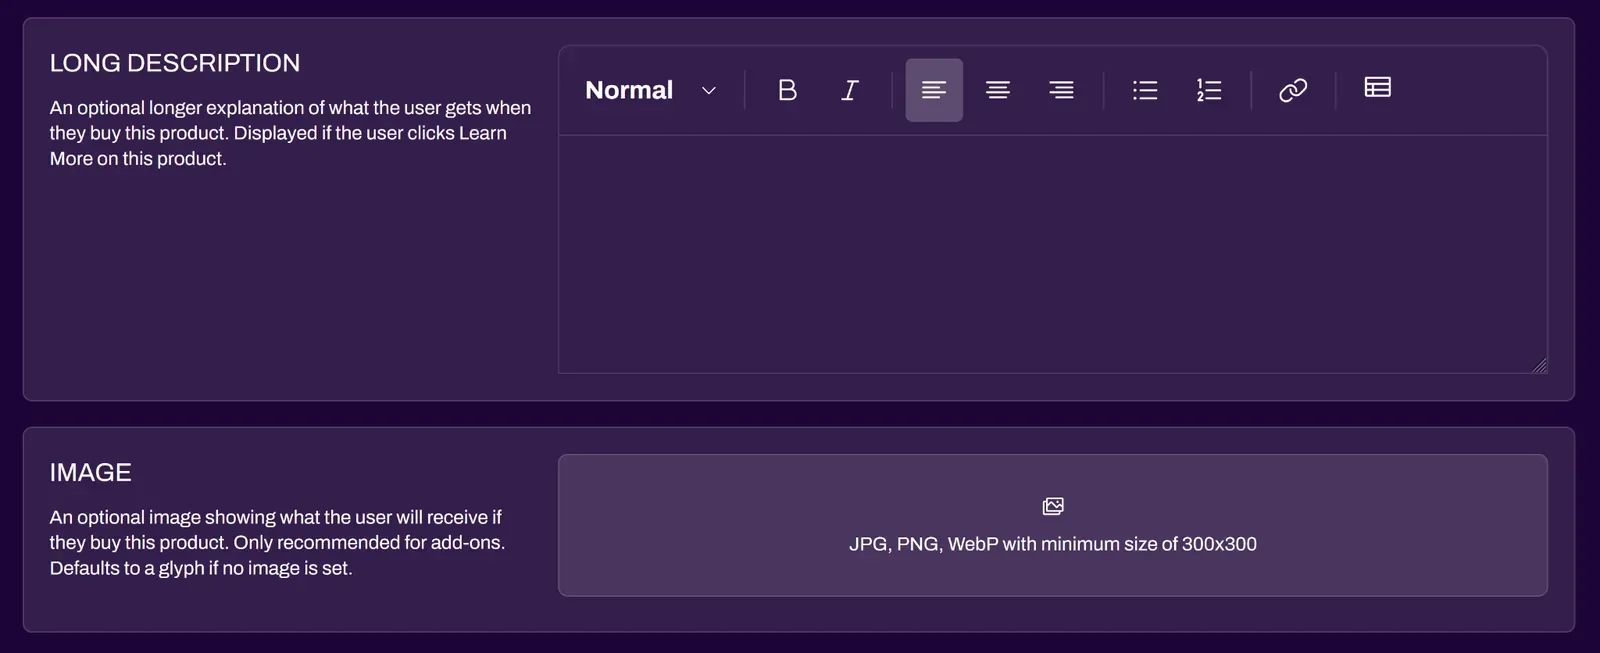
Long Description and Ticket Image are optional. Ticket Images are primarily useful for add-ons, giving the ability to easily identify products for both the user frontend and your sales backend.
-
Inventory & Max Quantity
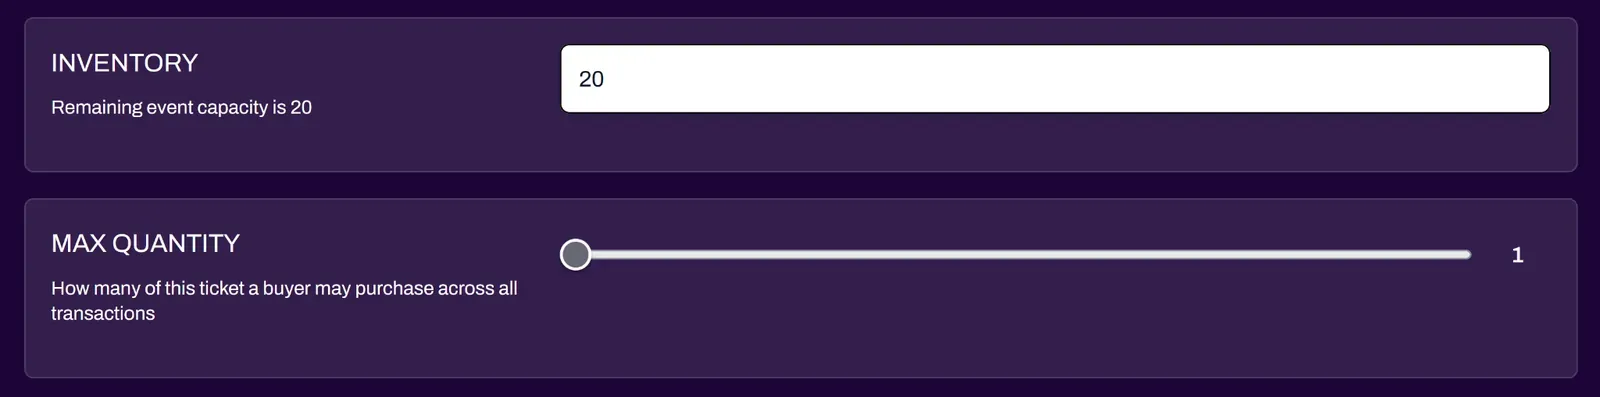
Section titled “Inventory & Max Quantity”Inventory should reflect how many of this specific ticket you want to sell. You can create multiple tickets for events, each with their own inventory. You may need to raise the Capacity in the Event Editor if other tickets have already been assigned to the current event capacity.
Max Quantity limits the user on how many purchases they can make for the specific ticket. Event admission most likely should be set to Max Quantity of 1 (1 ticket per user). Tournament Tickets are automatically locked to Max Quantity of 1. You can control how many add-ons a user can buy with this toggle. For example, if selling merchandise add-ons, you can limit 2 t-shirts per customer by setting this to Max Quantity 2.
-
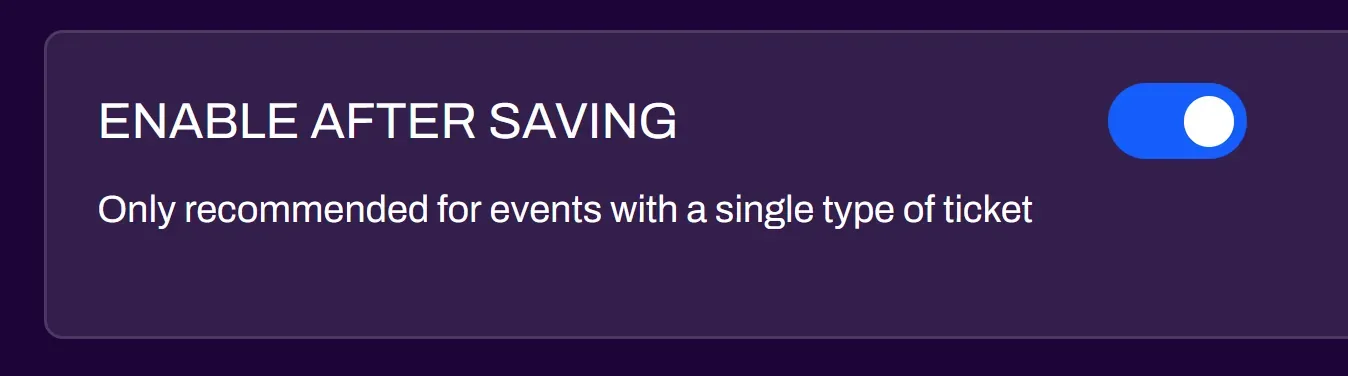
Enable After Saving
Section titled “Enable After Saving”Enable After Saving automatically turns the ticket toggle ON after creating the ticket. This is primarily useful for pre-registrations or advanced sales. If you wish to edit a ticket after creation, the ticket toggle must be set to OFF before you are able to edit it. Be sure to turn it back on, or toggle Enable After Saving back to ON when saving your edits.
-
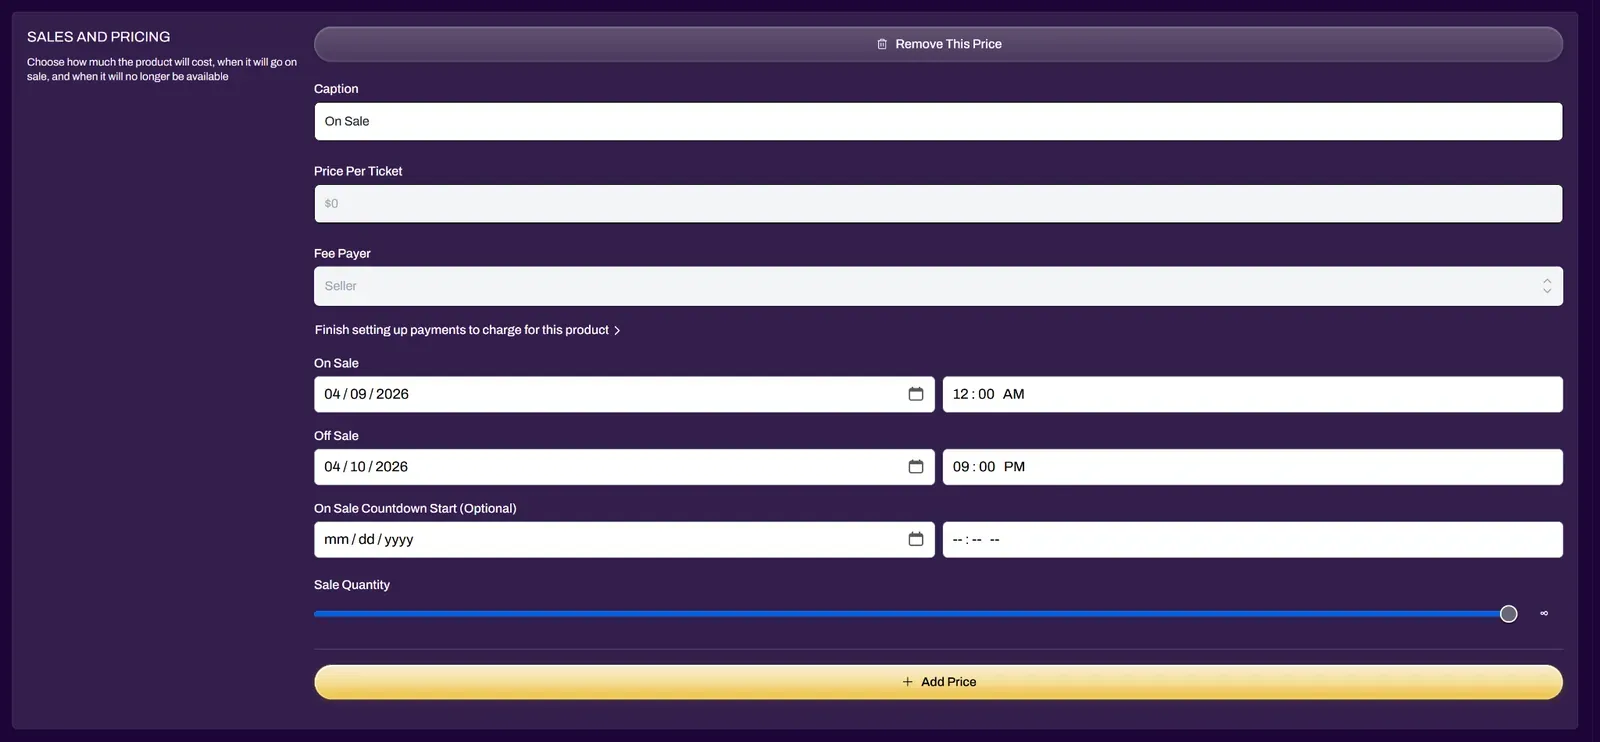
Sales & Pricing
Section titled “Sales & Pricing”Price per ticket will automatically be locked to $0 until a Stripe account has been linked. Once active, all ticket proceeds will go to the Stripe account of the associated organization of the event.
Fee Payer is default set to Seller, but you have the ability to change it to Buyer if you wish.
On Sale Date will default automatically to the current date you are creating the ticket.
Off Sale Date will default automatically to the Event End date and time.
Sale Quantity is how many of this ticket you want to sell at the options you have chosen. Defaults to unlimited. This option is useful for dynamic pricing such as “Early Bird Specials” where you can assign a portion of the tickets to be cheaper than the rest.
-
Grants
Section titled “Grants”Grants determine what the ticket allows the user to do at an event. This is automatically defaulted to Event Admission, and additional options such as Tournament Admission may show up here in the case of a Tournament Ticket. You may have 1 ticket combine multiple grants, such as a Tournament Ticket granting both Event Admission and Tournament Admission.
You can also set the limit for how many times a ticket can be redeemed.

-
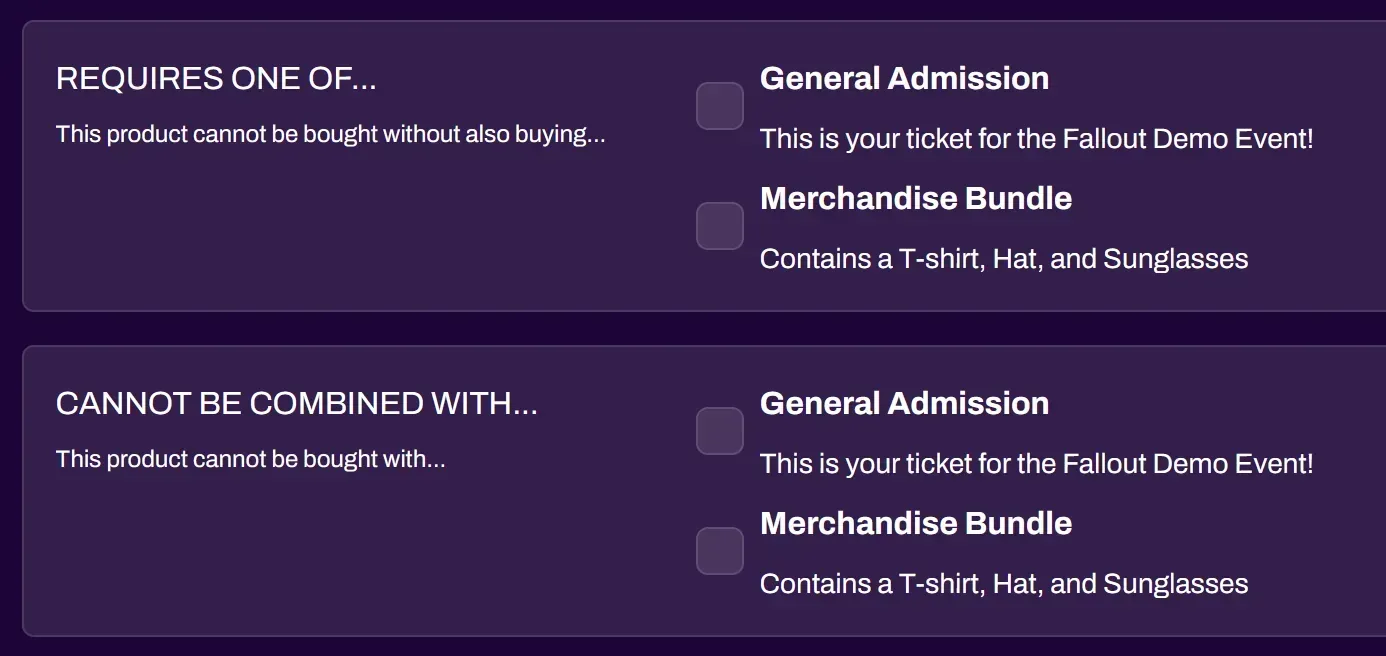
Ticket Requirements
Section titled “Ticket Requirements”Optional
When creating additional tickets, you have the ability to require specific tickets to be purchased together, or make certain ticket combinations forbidden. You can use these options to control what event attendees are allowed to purchase together, and also safeguard them from over-purchasing something included in a VIP ticket, for example.
Once ticketing has been set up and is active, the Not Available button on your event will switch to Join Event.
Coupons
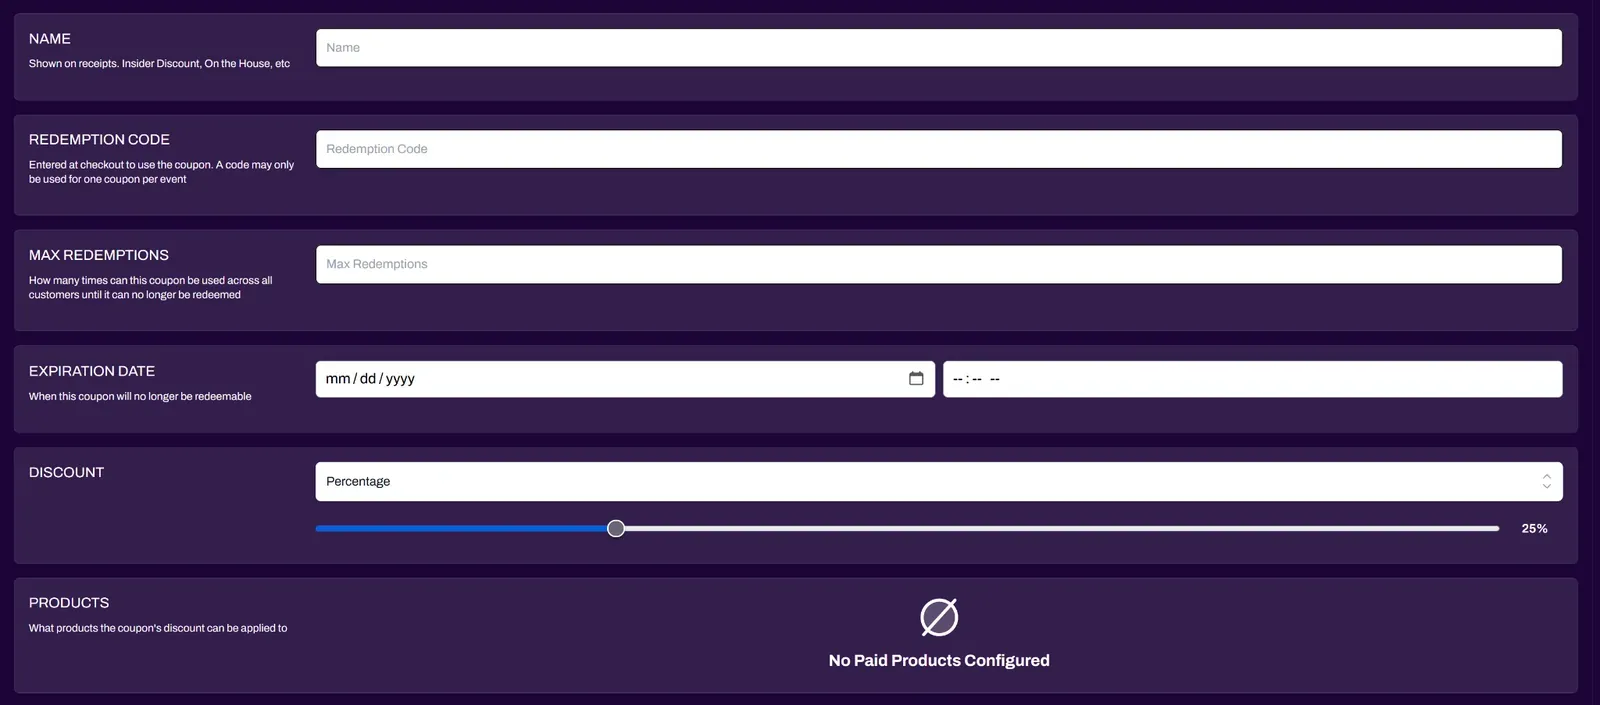
Section titled “Coupons”Coupons can be created for paid tickets. You are able to create coupons for a percentage of the ticket, or for a specific amount. In the case of cash payments for example, you can create a discount coupon for 100% off. You can also set a limit to how many times you would like the coupon to be redeemed.
Video Tutorial
Section titled “Video Tutorial”You can watch a video tutorial here, covering event creation, ticketing, and how attendees would join.